Facebook
 X
X
 Pinterest
 Copy Link
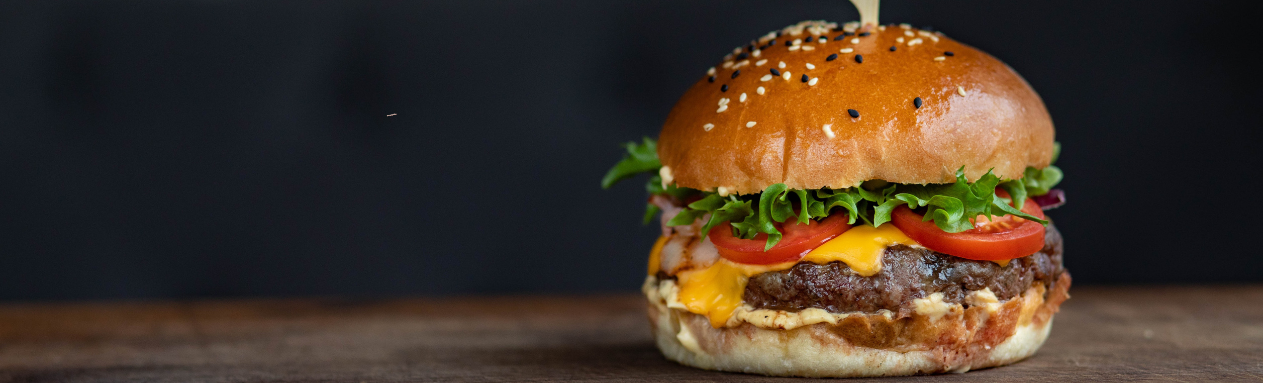
I Will Pay You on Tuesday for a Hamburger Today!
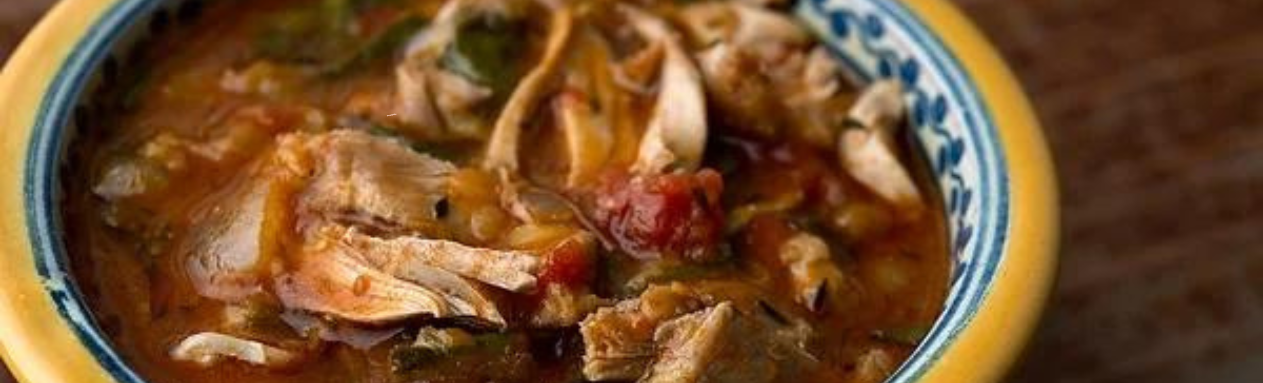
The hamburger is one of the world’s most popular foods, with nearly 50 billion served up annually in the United States alone. Although the humble beef-patty-on-a-bun is technically not much more than 100 years old, it’s part of a far greater lineage, linking American businessmen, World War II soldiers, German political refugees, medieval traders and Neolithic farmers.
Ground Beef Comes to America
The groundwork for the ground-beef sandwich was laid with the domestication of cattle (in Mesopotamia around 10,000 years ago), and with the growth of Hamburg, Germany, as an independent trading city in the 12th century, where beef delicacies were popular.
Jump ahead to 1848, when political revolutions shook the 39 states of the German Confederation, spurring an increase in German immigration to the United States. With German people came German food: beer gardens flourished in American cities, while butchers offered a panoply of traditional meat preparations. Because Hamburg was known as an exporter of high-quality beef, restaurants began offering a “Hamburg-style” chopped steak.
In mid-19th-century America, preparations of raw beef that had been chopped, chipped, ground or scraped were a common prescription for digestive issues. After a New York doctor, James H. Salisbury suggested in 1867 that cooked beef patties might be just as healthy, cooks and physicians alike quickly adopted the “Salisbury Steak”. Around the same time, the first popular meat grinders for home use became widely available (Salisbury endorsed one called the American Chopper) setting the stage for an explosion of readily available ground beef.
The Hamburger Becomes a Fast Food Staple
The hamburger seems to have made its jump from plate to bun in the last decades of the 19th century, though the site of this transformation is highly contested. Lunch wagons, fair stands and roadside restaurants in Wisconsin, Connecticut, Ohio, New York and Texas have all been put forward as possible sites of the hamburger’s birth. Whatever its genesis, the burger-on-a-bun found its first wide audience at the 1904 St. Louis World’s Fair, which also introduced millions of Americans to new foods ranging from waffle ice cream cones and cotton candy to peanut butter and iced tea.
Two years later, though, disaster struck in the form of Upton Sinclair’s journalistic novel The Jungle, which detailed the unsavory side of the American meatpacking industry. Industrial ground beef was easy to adulterate with fillers, preservatives and meat scraps, and the hamburger became a prime suspect.
The hamburger might have remained on the seamier margins of American cuisine were it not for the vision of Edgar “Billy” Ingram and Walter Anderson, who opened their first White Castle restaurant in Kansas in 1921. Sheathed inside and out in gleaming porcelain and stainless steel, White Castle countered hamburger meat’s low reputation by becoming bastions of cleanliness, health and hygiene (Ingram even commissioned a medical school study to show the health benefits of hamburgers). His system, which included on-premise meat grinding, worked well and was the inspiration for other national hamburger chains founded in the boom years after World War II: McDonald’s and In-N-Out Burger (both founded in 1948), Burger King (1954) and Wendy’s (1969).
Led by McDonald’s (and helped by the introduction abroad of U.S. hamburger culture by millions of members of the American armed services during World War II), the hamburger—and American-style franchised fast-food—soon spread globally.
History of the Hamburger – Facts and Types
Hamburger is basically a type of sandwich. It has a ground meat patty that is cooked and placed between two halves of a bun or two pieces of bread or toast. It often has some condiments inside, like: mustard, mayonnaise, ketchup, lettuce, tomato, onion, and pickles. Who precisely invented the hamburger, we don’t know for sure. We know that it appeared, in the shape that we know it today, in 19th or early 20th century and that it has predecessors that date to a 12th century.
Nomadic Mongol’s of 12th century and their army were mostly cavalry and often, in their conquests, didn’t have time to stop for a meal. When they had to eat while riding they would place pieces of meat in skin and whole package under the saddle. Constant jogging minced the meat and the heat from the horse would cook it. This way of preparation came to Moscow with Mongols and was later named steak tartare. From there, minced meat came to the lands of today’s Germany through the port of Hamburg during the 17th century and became popular as a basis for their own dishes.
Hamburgh Sausage (which is made of minced meat and spices) appeared in 1763 in the cookbook with a name “Art of Cookery, Made Plain and Easy”. Jules Verne mentions steak tartare in 1875. During the 19th century Hamburg became one of the largest transatlantic ports in Europe and many northern European emigrants came to United States from this port. Hamburg steak appeared in the New York City in the 19th century. It was minced by hand, salted, smoked, and served raw with onions and bread crumbs and is considered precursor to the hamburger.
We don’t know who invented the hamburger because a little is written about it when it first appeared. Earliest text in a newspaper comes from Chicago Daily Tribune from July 5, 1896. The Library of Congress says that Louis Lassen sold the first hamburger in the United States in 1900. Charlie Nagreen claimed that he sold meatballs between two slices of bread at the Seymour Fair in 1885 and named them hamburgers after the Hamburg steak which was familiar to local German immigrants.
White Castle, a fast food chain, gives this honor to Otto Kuase who, in 1891, created a beef patty cooked in butter and topped with a fried egg which was later omitted. The family of Oscar Weber Bilby says that he invented the hamburger in 1891. Frank and Charles Menches claimed that they run out of pork sausages during the Erie County Fair in Hamburg, New York in 1885, and that they bought chopped up beef from a butcher. They started using it in their ground beef sandwiches. There is even menu from Delmonico’s in New York which listed hamburger in 1834 but it was just a patty without buns.
Many others claimed that they invented hamburger but we will probably never know who did it first. That doesn’t stop the hamburger to be the staple food of many fast food restaurants in the world.
Every One Still knows this little song…McDonalds Big Mac
The 1970s ushered in a new era in the long line of popular jingles delivered by the ubiquitous fast food chain McDonald’s. 1974 marked their first try at getting into the rap game with the Big Mac track “Two All Beef Patties, Special Sauce, Lettuce, Cheese, Pickles, Onions on a Sesame Seed Bun.” Originally, the ingredients appeared as a one-word heading for a McDonald’s ad developed for college newspapers, but were eventually set to music created by Mark Vieha (who performed the original jingle). In cynical post-Watergate America, it gave young fast food lovers something to get excited about. The commercial showcases what a mouthful the slogan was for regular folks trying it out, and we’d bet it’s still not quite as easy to say today without cheating. Now I bet this will stick in your head for a while!
This copycat Big Mac Sauce recipe is so close to the McDonald’s special sauce, you won’t be able to taste the difference! Use it to recreate your own homemade Big Macs, or as a topping and sauce for your favorite foods.
MCDONALD’S BIG MAC SAUCE (COPYCAT RECIPE)
This copycat Big Mac Sauce recipe is so close to the McDonald’s special sauce, you won’t be able to taste the difference! Use it to recreate your own homemade Big Macs, or as a topping and sauce for your favorite foods.
WHAT IS IT?
Big Mac Sauce has wonderfully creamy, tangy, and sweet. This flavor combination stands cuts through the richness of a fatty cheeseburger, making it a perfect burger topping. It is said to taste very similar to Thousand Island dressing, despite not being tomato-based.
Created by Jim Delligatti 1967, the original Big Mac wasn’t actually called a Big Mac. It first went by different names – “The Aristocrat” and the “Blue Ribbon Burger”, neither of which caught on with customers. The third name, “Big Mac” was created by Esther Glickstein Rose, a young corporate McDonald’s employee. This sandwich went on to worldwide fame, popularizing the iconic special sauce.
The earliest McDonald’s advertisements didn’t refer to Big Mac Sauce as we now know it, but rather, called it “secret sauce”. However, in 1974 a new advertising campaign came up with the famous jingle “Two all-beef patties, special sauce, lettuce, cheese, pickles, onions – on a sesame seed bun.” It has been known as “special sauce” ever since!
Based on McDonald’s ingredient list, you will need sweet relish (not dill pickle relish), mayo, vinegar, American yellow mustard, garlic powder, onion powder, and paprika to make homemade Big Mac sauce. That sounds a lot more reasonable, doesn’t it? Store in an airtight container in your refrigerator.
This recipe makes about a half-cup of sauce.
Ingredients
1/4 cup real mayonnaise
1 tablespoon + 2 teaspoons ketchup
1 tablespoon finely diced yellow onion
1 tablespoon sweet pickle relish
2 teaspoons yellow mustard
1/4 teaspoon white vinegar
Pinch of paprika for color (adjust to taste and color)
Tiny pinch cayenne pepper (if you want a little kick)
Instructions
Step 1: Mix the first three ingredients
Stir the mayonnaise, ketchup and diced onion together in a small bowl.
Step 2: Add the pickle relish
Squeeze the excess liquid from the sweet pickle relish, then add the relish to the bowl.
Step 3: Stir
Next, add the remaining ingredients and stir everything well to make a creamy sauce. This is where you add the paprika for color, be sure to taste as you add at this last step.
Use the sauce immediately or refrigerate it to let the flavors deepen. Store your Big Mac sauce covered air tight container in the refrigerator for up to one week.
Homemade Big Macs – To make McDonald’s Big Mac, lightly toast a sesame seed bun, and grab an extra bottom bun to use as the middle piece. Spread the special sauce on the bottom bun, sprinkle with diced onion, shredded lettuce, and top with a slice of American cheese. Place one thin burger patty on the cheese, then add the middle bun, top with more sauce, lettuce, and add pickles. Finally add the second burger patty, top with the crown of the bun and enjoy!
Here you are so enjoy!