Color Me Blue on Blue
The color blue is associated with two of Earth’s greatest natural features: the sky and the ocean. But that wasn’t always the case. Some scientists believe that the earliest humans were actually colorblind and could only recognize black, white, red, and only later yellow and green. As a result, early humans with no concept of the color blue simply had no words to describe it. This is even reflected in ancient literature, such as Homer’s Odyssey, that describes the ocean as a “wine-red sea.”
Blue was first produced by the ancient Egyptians who figured out how to create a permanent pigment that they used for decorative arts. The color blue continued to evolve for the next 6,000 years, and certain pigments were even used by the world’s master artists to create some of the most famous works of art. Today it continues to evolve, with the latest shade discovered less than a decade ago. Read on to learn more about the color’s fascinating history.
Egyptian Blue:
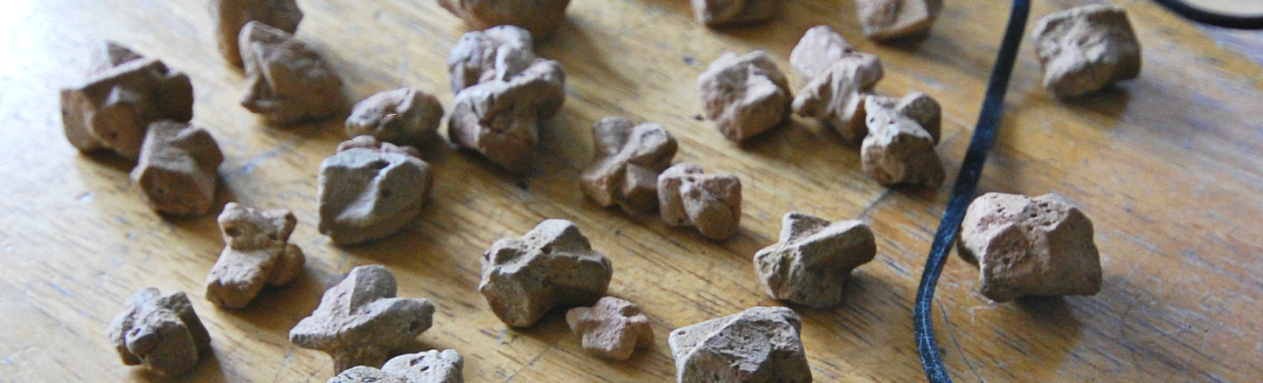
There’s a long list of things we can thank the ancient Egyptians for inventing, and one of them is the color blue. Considered to be the first ever synthetically produced color pigment, Egyptian blue (also known as cuprorivaite) was created around 2,200 B.C. It was made from ground limestone mixed with sand and a copper-containing mineral, such as azurite or malachite, which was then heated between 1470 and 1650°F. The result was an opaque blue glass which then had to be crushed and combined with thickening agents such as egg whites to create a long-lasting paint or glaze.
The Egyptians held the hue in very high regard and used it to paint ceramics, statues, and even to decorate the tombs of the pharaohs. The color remained popular throughout the Roman Empire and was used until the end of the Greco-Roman period (332 BC–395 AD), when new methods of color production started to evolve.
Fun fact: In 2006, scientists discovered that Egyptian blue glows under fluorescent lights, indicating that the pigment emits infrared radiation. This discovery has made it a lot easier for historians to identify the color on ancient artifacts, even when it’s not visible to the naked eye.
Ultramarine:
The history of ultramarine began around 6,000 years ago when the vibrant, semi-precious gemstone it was made from—lapis lazuli—began to be imported by the Egyptians from the mountains of Afghanistan. However, the Egyptians tried and failed to turn it into a paint, with each attempt resulting in a dull gray. Instead, they used it to make jewelry and headdresses.
Also known as “true blue,” lapis lazuli first appeared as a pigment in the 6th century and was used in Buddhist paintings in Bamiyan, Afghanistan. It was renamed ultramarine—in Latin: ultramarinus, meaning “beyond the sea”—when the pigment was imported into Europe by Italian traders during the 14th and 15th centuries. Its deep, royal blue quality meant that was highly sought after among artists living in Medieval Europe. However, in order to use it you had to be wealthy, as it was considered to be just as precious as gold.
Ultramarine was usually reserved for only the most important commissions, such as the blue robes of the Virgin Mary in Gérard David’s Virgin and Child with Female Saints. Supposedly, Baroque master Johannes Vermeer—who painted Girl with a Pearl Earring—loved the color so much that he pushed his family into debt. It remained extremely expensive until a synthetic ultramarine was invented in 1826, by a French chemist, which was then aptly named “French Ultramarine.”
Fun fact: Art historians believe that Michelangelo left his painting The Entombment (1500–01) unfinished because he could not afford to buy more ultramarine blue.
Cobalt Blue:
Cobalt blue dates back to the 8th and 9th centuries, and was then used to color ceramics and jewelry. This was especially the case in China, where it was used in distinctive blue and white patterned porcelain. A purer alumina-based version was later discovered by French chemist Louis Jacques Thénard in 1802, and commercial production began in France in 1807. Painters—such as J. M. W. Turner, Pierre-Auguste Renoir, and Vincent Van Gogh—started using the new pigment as an alternative to expensive ultramarine.
Fun fact: Cobalt blue is sometimes called Parrish blue because artist Maxfield Parrish used it to create his distinct, intensely blue skyscapes.
Cerulean:
Originally composed of cobalt magnesium stannate, the sky-colored cerulean blue was perfected by Andreas Höpfner in Germany in 1805 by roasting cobalt and tin oxides. However, the color was not available as an artistic pigment until 1860 when it was sold by Rowney and Company under the name of coeruleum. Artist Berthe Morisot used cerulean along with ultramarine and cobalt blue to paint the blue coat of the woman in A Summer’s Day, 1887.
Fun fact: In 1999, Pantone released a press release declaring cerulean as the “Color of the Millennium,” and “the hue of the future.”
Indigo:
Although blue was expensive to use in paintings, it was much cheaper to use for dying textiles. Unlike the rarity of lapis lazuli, the arrival of a new blue dye called “indigo” came from a excessively grown crop—called Indigofera tinctoria—that was produced across the world. Its import shook up the European textile trade in the 16th century, and catalyzed trade wars between Europe and America.
The use of indigo for dyeing textiles was most popular in England, and was used to dye clothing worn by men and women of all social backgrounds. Natural indigo was replaced in 1880, when synthetic indigo was developed. This pigment is still used today to dye blue jeans. However, over the last decade scientists have discovered that the bacteria Escherichia coli can be bio-engineered to produce the same chemical reaction that makes indigo in plants. This method, called “bio-indigo,” will likely play a big part in manufacturing environmentally friendly denim in the future.
Fun fact: Sir Isaac Newton—the inventor of the “color spectrum”—believed that the rainbow should consist of seven distinct colors to match the seven days of the week, the seven known planets, and the seven notes in the musical scale. Newton championed indigo, along with orange, even though many other contemporary scientists believed the rainbow only had five colors.
Navy Blue or Marine Blue:
Formally known as marine blue, the darkest shade of blue—also known as navy blue—was adopted as the official color for British Royal Navy uniforms, and was worn by officers and sailors from 1748. Modern navies have since darkened the color of their uniforms to almost black in an attempt to avoid fading. Indigo dye was the basis for historical navy blue colors dating from the 18th century.
Fun fact: There are many variations of navy blue, including Space cadet, a color that was formulated in 2007. This hue is associated with the uniforms of cadets in the space navy; a fictional military service armed with the task of exploring outer space.
Berliner Blau or Prussian Blue:
Also known as Berliner Blau, Prussian blue was discovered accidentally by German dye-maker Johann Jacob Diesbach. In fact, Diesbach was working on creating a new red, however, one of his materials—potash—had come into contact with animal blood. Instead of making the pigment even redder like you might expect, the animal blood created a surprising chemical reaction, resulting in a vibrant blue.
Pablo Picasso used the Prussian blue pigment exclusively during his Blue Period, and Japanese woodblock artist Katsushika Hokusai used it to create his iconic The Great Wave off Kanagawa, as well as other prints in his Thirty-six Views of Mount Fuji series. However, the pigment wasn’t only used for creating masterpieces. In 1842, English astronomer Sir John Herschel discovered that Prussian blue had a unique sensitivity to light, and was the perfect hue to create copies of drawings. This discovery proved invaluable to the likes of architects, who could create copies of their plans and designs that are today known as “blueprints.”
Fun fact: Today, Prussian blue is used in a pill form to cure metal poisoning.
International Klein Blue:
In pursuit of the color of the sky, French artist Yves Klein developed a matte version of ultramarine that he considered the best blue of all. He registered International Klein Blue (IKB) as a trademark and the deep hue became his signature between 1947 and 1957. He painted over 200 monochrome canvases, sculptures, and even painted human models in the IKB color so they could “print” their bodies onto canvas.
Fun fact: Klein once said “blue has no dimensions. It is beyond dimensions,” believing that it could take the viewer outside the canvas itself.
The Latest Discovery: YInMn
In 2009, a new shade of blue was accidentally discovered by Professor Mas Subramanian and his then graduate student Andrew E. Smith at Oregon State University. While exploring new materials for making electronics, Smith discovered that one of his samples turned bright blue when heated. Named YInMn blue, after its chemical makeup of yttrium, indium, and manganese, they released the pigment for commercial use in June 2016.
Fun fact: YInMn blue was recently added to the Crayola crayon collection.
By the name itself, it was invented in Ancient Egypt around 2,200 B.C., the same timeline they built the famous Great Pyramid.
The Egyptians were making complex combinations of certain limestones, sand, and minerals to produce a beautiful opaque blue glass.
Ultramarine (Lapiz Lazuli):
The semi-precious stone Lapis Lazuli, a deep-blue metamorphic rock, was highly prized among the Egyptians.
During the Renaissance, the bright blue mineral initially invented by Egyptians was often combined with other ingredients, which led to the development of the pigment ultramarine ー the most expensive of all pigments.
The famous gemstone can only be found in the rare mountains of Afghanistan.
Ultramarine is also known as ‘true blue’ and became a special detail in jewelry and headdresses back in the day.
Meaning of the Color Blue:
Blue, a color that commands a unique position in the color spectrum, has permeated various aspects of our lives, imbuing them with profound meanings and emotions. As the color of the sky and sea, it has been a ceaseless source of inspiration and symbolism throughout history and across cultures.
It’s interesting to note that in the Middle Ages, the production of blue dyes, crafted from the precious stone Lapis Lazuli, was quite an expensive process. As a result, wearing blue clothing became a symbol of wealth, power, and prestige among the nobility.
Blue meaning and Psychology:
Calmness and peace are two words that come to mind when thinking about the color blue. It is a non-aggressive color that encourages serenity, orderliness, and tranquility. This could be because we associate oceans with blue, and it can be a mentally soothing color for some people.
Blue tends to be an appetite suppressant color.
Surveys show that blue is the least appetizing color, so some weight loss plans recommend eating food on a blue plate.
It is also known to lower blood pressure, which slows the heart rate and causes the body to relax.
Blue promotes trust and dependability.
The color blue can boost productivity due to its relaxing and mentally stimulating effects.
It has been chosen as the color of choice for law enforcement officers worldwide because it is associated with trust and dependability.
The idea behind blue uniforms is that blue should convey the various shades of blue promote positive and negative psychological associations. It affects our mood, perceptions, and even physiological responses.
Darker shades of blue are known to help improve how we solve problems and make decisions.
Lighter shades aid in focusing on details while performing a given task.
The color blue is often linked to creativity, which helps generate ideas even under pressure.
Music genres that are called ‘blue’ are often referred to as sad songs related to breakup, loss of someone, and other painful experiences.
Blue drinks that are brighter in shade have been known to cause people to feel thirst.
Blue Personality Type:
Somehow, the life purpose of those who like the color blue is linked with their ability to contribute to other people’s well-being. People who favor this color are known to be confident, loyal, and calm. However, they can also evoke feelings of sadness and depression.
So if your favorite color is blue, what does it say about your personality?
Positive Traits of Blue:
Confident
You often display composure and can focus on your strengths rather than your weaknesses.
You believe in yourself, which can motivate others to do the same.
Honest
Those who like the color blue are known to be reliable and trustworthy on a given responsibility.
You are true to yourself, reflecting your genuine intention with others.
Introvert
You spend a lot of time analyzing your thoughts and emotions.
Spending ‘me-time’ makes you feel more energized than hanging out with people.
You don’t like attention and prefer to blend in with the crowd.
Loyal
You prefer strong and deep relationships compared to superficial ones.
Aside from valuing commitment, you also appear to be determined about everything.
Good listener
Being a good listener allows you to be great friends with others even though you risk becoming emotionally dependent.
You also provide support and encouragement to people you care about.
Great partner
You avoid conflicts because, for you, one of the essential things in a relationship is the ability to communicate openly and honestly, which is why you are a great choice for someone who likes romantic and nurturing partners.
You are often affectionate, warm, and aware of other people’s feelings.
Negative Traits of Color Blue:
Blue can sometimes appear icy, cold, and unfriendly. You may also identify yourself as having some of its opposing sides, especially if under pressure and stress.
Sensitive
Sometimes, you have a hard time letting go of the past and being emotional.
You can be easily affected by how people treat you.
When your emotions take over, you become moody and overly sensitive.
Stubborn
Due to your determination, you often refuse to change your opinion on something.
You visibly feel frustration and impatience when others try to convince you of something you disagree with.
Anxious
The idea of coming out of your comfort zone makes you feel anxious.
You are easily flustered over frequent changes and prefer to keep everything on its initial plan.
You tend to get cautious and worry even about the little things.
Lack of spontaneity
Being comfortable with your comfort zone, you lack a sense of adventure.
When overwhelmed, you act out or become indifferent, which is why others find you cold-hearted.
Your predictability makes you monotonous or even boring.
Self-depreciation
As you’re too busy putting the needs of others first, you often forget you have to take care of yourself as well.
Your negativity at times can also lead to self-pity.
Blue in fashion
One important step towards creating a good impression is your outfit. We dress according to every situation, and we have to choose what color to wear wisely. If your goal is to have people perceive you as a competent and sincere individual, wearing blue clothing is an excellent way to start.
As mentioned earlier, blue is also widely used in uniforms as it conveys an authoritative and confident image. We usually see different hues of blue in clothing for both men and women. It is one of the most comfortable colors to wear in interviews, work, or even casual days.
On your first date, one can even wear a lovely blue dress or a nice blue tuxedo on a wedding day. It’s a color that represents loyalty, peace, confidence, and success – traits that we want to show people when they first see us.
Blue in business
Blue is the color of trust. It suggests loyalty and integrity, which is why it is a great choice for businesses that want to project dependability, security, and peacefulness, such as financial companies.
Different hues of blue in branding and advertising can help manifest all the positive aspects of the color. In addition, it helps in building customer loyalty, which appears to be beneficial for small business owners.
Because blue is linked with reliability and trustworthiness, workplaces painted in this color can help improve business partnerships. Blue also connotes peace, responsibility, and relaxation, so it can boost workplace motivation while also promoting a pleasant and comfortable environment.
Blue is favored by both men and women, which is another good reason to use it for business.
Blue in nature
Blue is known to be the rarest color found in nature. While we may all agree that we often see the blue sky and ocean around us, have you ever seen other blue species of nature? Say for example a bluebird, blue insect, or blue plant? These unique organisms leave us in awe yet are hard to find.
Scientifically speaking, we see colors based on the light it absorbs from the color spectrum. The existence of the color blue in nature usually relies on chemistry, physics, or a combination of both sciences.
Blue Flowers
Did you know that blue flowers don’t really exist? The blue flowers we see are a combination of plant pigments and minerals combined with light. In fact, plenty of what we call ‘blue flowers’ are actually blue-toned purple, lavender, or even a cool-toned red.
Blue Animals
Blue animals on the other hand rely on physics to create a blue appearance. Certain animals that have rich blue hues are blue butterflies, peacocks, and a few other animals. Some are even using their blue hue to warn the predators while some rare sea creatures are like blue lights that are switching from time to time.
Blue in web design
Blue is currently considered one of the most demanding colors for web designers. Because of its common use, it has become too ordinary over time.
Some of the most popular websites, such as Facebook, Twitter, Foursquare, in the world have been using blue color schemes. However, they did it for a reason. Blue websites appear cool, transparent, clean, and modern. They give the appearance of power, but also safety.
Combining blue with different shades of grey can make a website look high-tech and sleek. Lighter shades of blue are mostly used for websites that are about health and wellness, travel, relaxation. Patriotic organizations, legal firms, sports team usually use darker shades.
Blue in marketing
Blue is frequently used for social media logos. One reason for that is that blue represents intelligence, communication and trust. In fact, out of all the colors on the color wheel, blue is by far the most trustworthy one. That is one of the main reasons why blue is a popular choice in marketing.
Besides that, studies have shown that people are 15 percent more likely to go to stores that are painted in the hue such as blue, rather than a warm color. Blue is non-invasive and suggests loyalty and reliability.
It is also one of the rare colors that is favored by people of all ages. While it can suggest professionalism and authority in one moment, in the other, it inspires friendliness and security.
Blue Random Facts:
• The ancient Egyptians associated blue with the sky god Horus and wore blue lapis lazuli jewelry as a symbol of heavenly power. The color was considered sacred and royal.
• During the Middle Ages, blue dyes derived from lapis lazuli were extremely expensive, making blue clothing a status symbol. Only the nobility could afford to wear blue.
• Indigo dye, originally made from the indigo plant, was the main source of blue until the 19th century. Its production was labor intensive, making blue clothing costly.
• Synthetic indigo, invented in the 1850s, dramatically lowered the cost of blue dyes and made blue clothing widely available. This led to the phrase “born in a blue” to describe ordinary people.
• Baby boys are often dressed in blue to signify masculinity while pink was initially the favored color for girls. These gender color associations have reversed multiple times over the past 200+ years.
• Studies show people associate the color blue with concepts like openness, stability, order, coolness and wisdom. Blue can produce physiological effects like reducing blood pressure and soothing nerves.
• Blue is the most common color found in nature. The sky appears blue due to the way light scatters in the atmosphere. Many flowers, minerals, and animals also have blue patterns or pigments.
• Blue is an appealing color in marketing and branding due to its positive associations of dependability, trust, confidence and competence. However, blue logos lack differentiation if overused.
• Studies show that the color blue can have calming effects on the brain and body. It causes the brain to release serotonin, which regulates mood, appetite and sleep.
• Blue light, in particular, suppresses the production of melatonin. This helps promote alertness during the day, but can interfere with sleep if exposed to blue light at night.
• Some research suggests that viewing or wearing the color blue reduces stress, heart rate and blood pressure. These physiological effects may be due to blue’s association with calmness and tranquility.
• Blue presents more positively in females than males. This is likely due to cultural connotations and gender stereotypes that favor blue for little girls and pink for boys.
• Blue produces mixed responses in marketing and branding. While often viewed as dependable and trustworthy, blue logos can seem dull, uninspiring and less distinctive over time.
• Darker blue hues tend to convey more serious meanings while lighter blues project brightness, freshness and simplicity. Mid-tone blues provide the optimal balance.
• The color blue is frequently used in web design due to its positive connotations of trust, stability and professionalism online. However, blue text can be hard to read depending on the background color.
• According to some thinkers, blue represents the unification of opposites: the masculine (sky) and feminine (sea). Blue becomes a metaphor for balance, bridging heaven and earth.
• Blue is considered a “cold” color which is ironically fitting given its association with water and vast open spaces. In color theory, blue is placed opposite orange on the color wheel.
Blue in Different Cultures:
• In Western cultures, blue is generally seen as a calm, tranquil and trustworthy hue. It symbolizes harmony, wisdom and spirituality. Blue is often used to represent water, the sky and infinity.
• In China, blue traditionally represented the east and spring. It was associated with immortality and wisdom. The ancient Chinese wore blue clothing to ward off evil spirits.
• In India, blue is the color of Krishna, one of the most beloved Hindu deities. Blue is seen as a divine, spiritual color that signifies truth and eternity. It is often used in religious ceremonies.
• In Japan, blue traditionally symbolized loyalty, honesty and symbols the season of autumn. The color was associated with water and wisdom. Darker blues represented masculinity.
• In Egypt, blue was the color of the sky god Horus and represented both masculinity and femininity. It symbolized creation, rebirth, protection and harmony. Blue garments were worn by both kings and queens.
• In Islam, blue is the color of transcendence and represents both heaven and divine truth. Blue mosques and tiles are meant to remind worshippers of the divine and spiritual realm.
• In Judaism, blue represents the heavens and divine truth. Blue threads were woven into the fringes of prayer shawls as a reminder of God’s commandments.
• In Africa, blue has more variable associations depending on the specific culture and region.
However, blue is commonly used to represent water, which is central to life across the continent. So in summary, while the specifics vary, many cultures associate the color blue with spirituality, wisdom, water, the heavens and divine truth. Blue largely carries positive meanings across diverse cultures, though the nuances and symbolism differ in interesting ways.
Colors That Compliment Blue Include:
• Orange: Blue and orange are opposites on the color wheel, so they create a highly contrasting and visually pleasing combination. Used together, blue and orange convey a sense of balance and completeness.
• Green: Warm greens like emerald and turquoise go well with cooler blue hues. Their similarity in brightness and saturation helps them harmonize. The pairing evokes natural, peaceful vibes.
• Purple: Blues and purples sit next to each other on the color wheel, so their tones naturally complement each other. Together they convey nobility, luxury and spirituality.
• Yellow: Lemon yellow provides a high-contrast partner to navy and cobalt blues. The complementary combination creates visual interest while still remaining visually soothing.
• Red: Pairing blue with red tones like burgundy and crimson produces a sophisticated, romantic color scheme. The vibrant contrast elevates the impact of both colors.
• Grey: Pairing blue with different shades of grey from silver to charcoal produces a neutral but stylish combination. The achromatic tones help balance the saturation of blue.
• White: White provides the highest contrast to navy and dark blues while still remaining versatile. The combination produces a crisp, clean aesthetic with a nautical or winter vibe.
Some key factors to keep in mind when pairing blue with complementary colors:
• Match brightness and saturation levels for harmonious combinations
• Higher color contrast creates visual interest but can be overpowering
• Analogous color schemes (next to blue on the wheel) blend smoothly
• Complementary colors (opposite blue) produce aesthetic balance
• Neutrals help balance blue’s intensity while adding sophistication
With these principles in mind, most colors can pair nicely with blue tones through altering their relative hues, tones and values. The right mix creates a balanced, aesthetically pleasing and stylistically cohesive color palette.
Colors that provide high contrast with blue include:
• Orange: As complementary colors opposite each other on the color wheel, orange and blue create a vibrant pairing with a visual tension that is both engaging and balancing. The classic combo signifies energy, creativity and balance.
• Yellow: Lemon yellow, mustard and gold hues provide high contrast with both dark and light blues. The combination conveys warmth, happiness and a summery vibe. Contrast can be modulated by adjusting relative tones.
• Red: When paired with blues like navy and cobalt, red produces a dramatic counterpoint that grabs attention while amplifying the impact of both hues. The balance signifies passion, excitement and warmth.
• Brown: Earthy tones like chocolate brown and caramel provide a striking though still natural contrast with blue tones. The relationship suggests stability, practicality and connection to the physical world.
• Black: Black contrasts perfectly with every other color, including all shades of blue. When combined well, black and blue convey elegance, authority and timelessness through their polarity.
• White: White offers the highest level of contrast with blue while maintaining versatility. The crisp pairing produces an atmospheric vibe that is both fresh and clean. Bright whites mimic a wintry color scheme.
Key principles for contrasting colors with blue:
• Complementary colors on the wheel provide the strongest contrast
• Relative tones should be adjusted to modulate the contrast level
• Analogous complements balance blue through harmony more than contrast
• Contrast enhances the expressive power and visual impact of both colors
• Excessive contrast can be jarring; aim for dynamic balance instead
• White and black contrasts emulate air and water, creating simplicity
By combining blue with contrasting colors thoughtfully, designers can tap into the energizing effects of polarity while retaining balance. The relative proportion of each hue determines whether the vibe is calming or stimulating. With wise use, high contrast enhances and elevates the inherent symbolism of blue.
Emily Brontë, ‘The Blue Bell’.
The blue bell is the sweetest flower
That waves in summer air;
Its blossoms have the mightiest power
To soothe my spirit’s care.
In this beautiful poem, the author of Wuthering Heights pays tribute to that bluest of flowers: the bluebell.
Emily Dickinson, ‘A Slash of Blue’.
We don’t just get the colour blue in this short poem by Emily Dickinson. We also get scarlet and purple, as she describes the sky at sunset:
A slash of Blue –
A sweep of Gray –
Some scarlet patches on the way,
Compose an Evening Sky –
A little purple – slipped between –
Some Ruby Trousers hurried on …
A. E. Housman, ‘Into My Heart an Air That Kills’.
Into my heart an air that kills
From yon far country blows:
What are those blue remembered hills,
What spires, what farms are those?
This short poem from Housman’s 1896 collection A Shropshire Lad earns its place on this pick of blue poems for its memorable reference to the ‘blue remembered hills’ of the speaker’s childhood, with ‘blue’ implying the melancholy quality to nostalgia (literally ‘the pain of returning home’).
Rudyard Kipling, ‘Blue Roses’.
Roses are red, the famous Valentine’s Day inscription tells us, while violets are blue. But here, Kipling (1865-1936) – or rather, the speaker of this poem by Kipling – is sent by his sweetheart on a quest to find blue roses:
Roses red and roses white
Plucked I for my love’s delight.
She would none of all my posies –
Bade me gather her blue roses.
Half the world I wandered through,
Seeking where such flowers grew.
Half the world unto my quest
Answered me with laugh and jest.
So my friends I bid you goodnight! Elaine


 Facebook
 X
X
 Pinterest
 Copy Link